Deploy the Dynamics 365 connector
activeThe Binoban connector is one Dynamics 365 solution. Import it, run Set up, connect it to Binoban, pick the tables to capture and press Apply. It takes about 30 minutes and needs no developer and no server access. For what the connector does once installed, see How the Dynamics 365 connector works.
Before you start
| You need | Why |
|---|---|
| Dynamics 365 CE on-premises 9.0 or 9.1 (Settings → About) | The connector is built for these versions only |
| A System Administrator account | To import the solution and run Set up |
A dedicated CRM user for the connector, for example CONTOSO\svc-binoban, Access Mode Non-interactive | The connector ignores changes made by its own service user. If you pick your own account, nothing you do is captured |
| HTTPS from the CRM servers to the Binoban API host, with a trusted certificate and a DNS name (not an IP address) | Plug-ins call Binoban directly from the CRM server |
| The Microsoft Dynamics 365 Asynchronous Processing Service running | Capture and retries run as background jobs |
From Binoban: apiHost, sourceIdentifier and apiKey | The three connection values |
| Chrome, Edge or Firefox | The admin page doesn't support Internet Explorer |
Install
-
Import the solution. Settings → Solutions → Import → choose
BinobanConnector_<version>_unmanaged.zip(test org) or the managed export (production) → Import. Then press Publish All Customizations. -
Open the admin page at
https://<crm-server>/<org>/WebResources/bnb_/admin/index.htmland bookmark it. After any upgrade, reload it with Ctrl+F5. -
Set up tab → Run set up. It creates the connector's tables, security roles, the API-key field security and its internal steps. It only adds what's missing, so it is safe to run again. When it finishes, every line but the heartbeat workflow says Ready.
-
Heartbeat workflow. Follow the five steps shown under the Set up checklist (Settings → Processes → New), activate the workflow, then press Start heartbeat. It retries waiting events every 2 minutes.
-
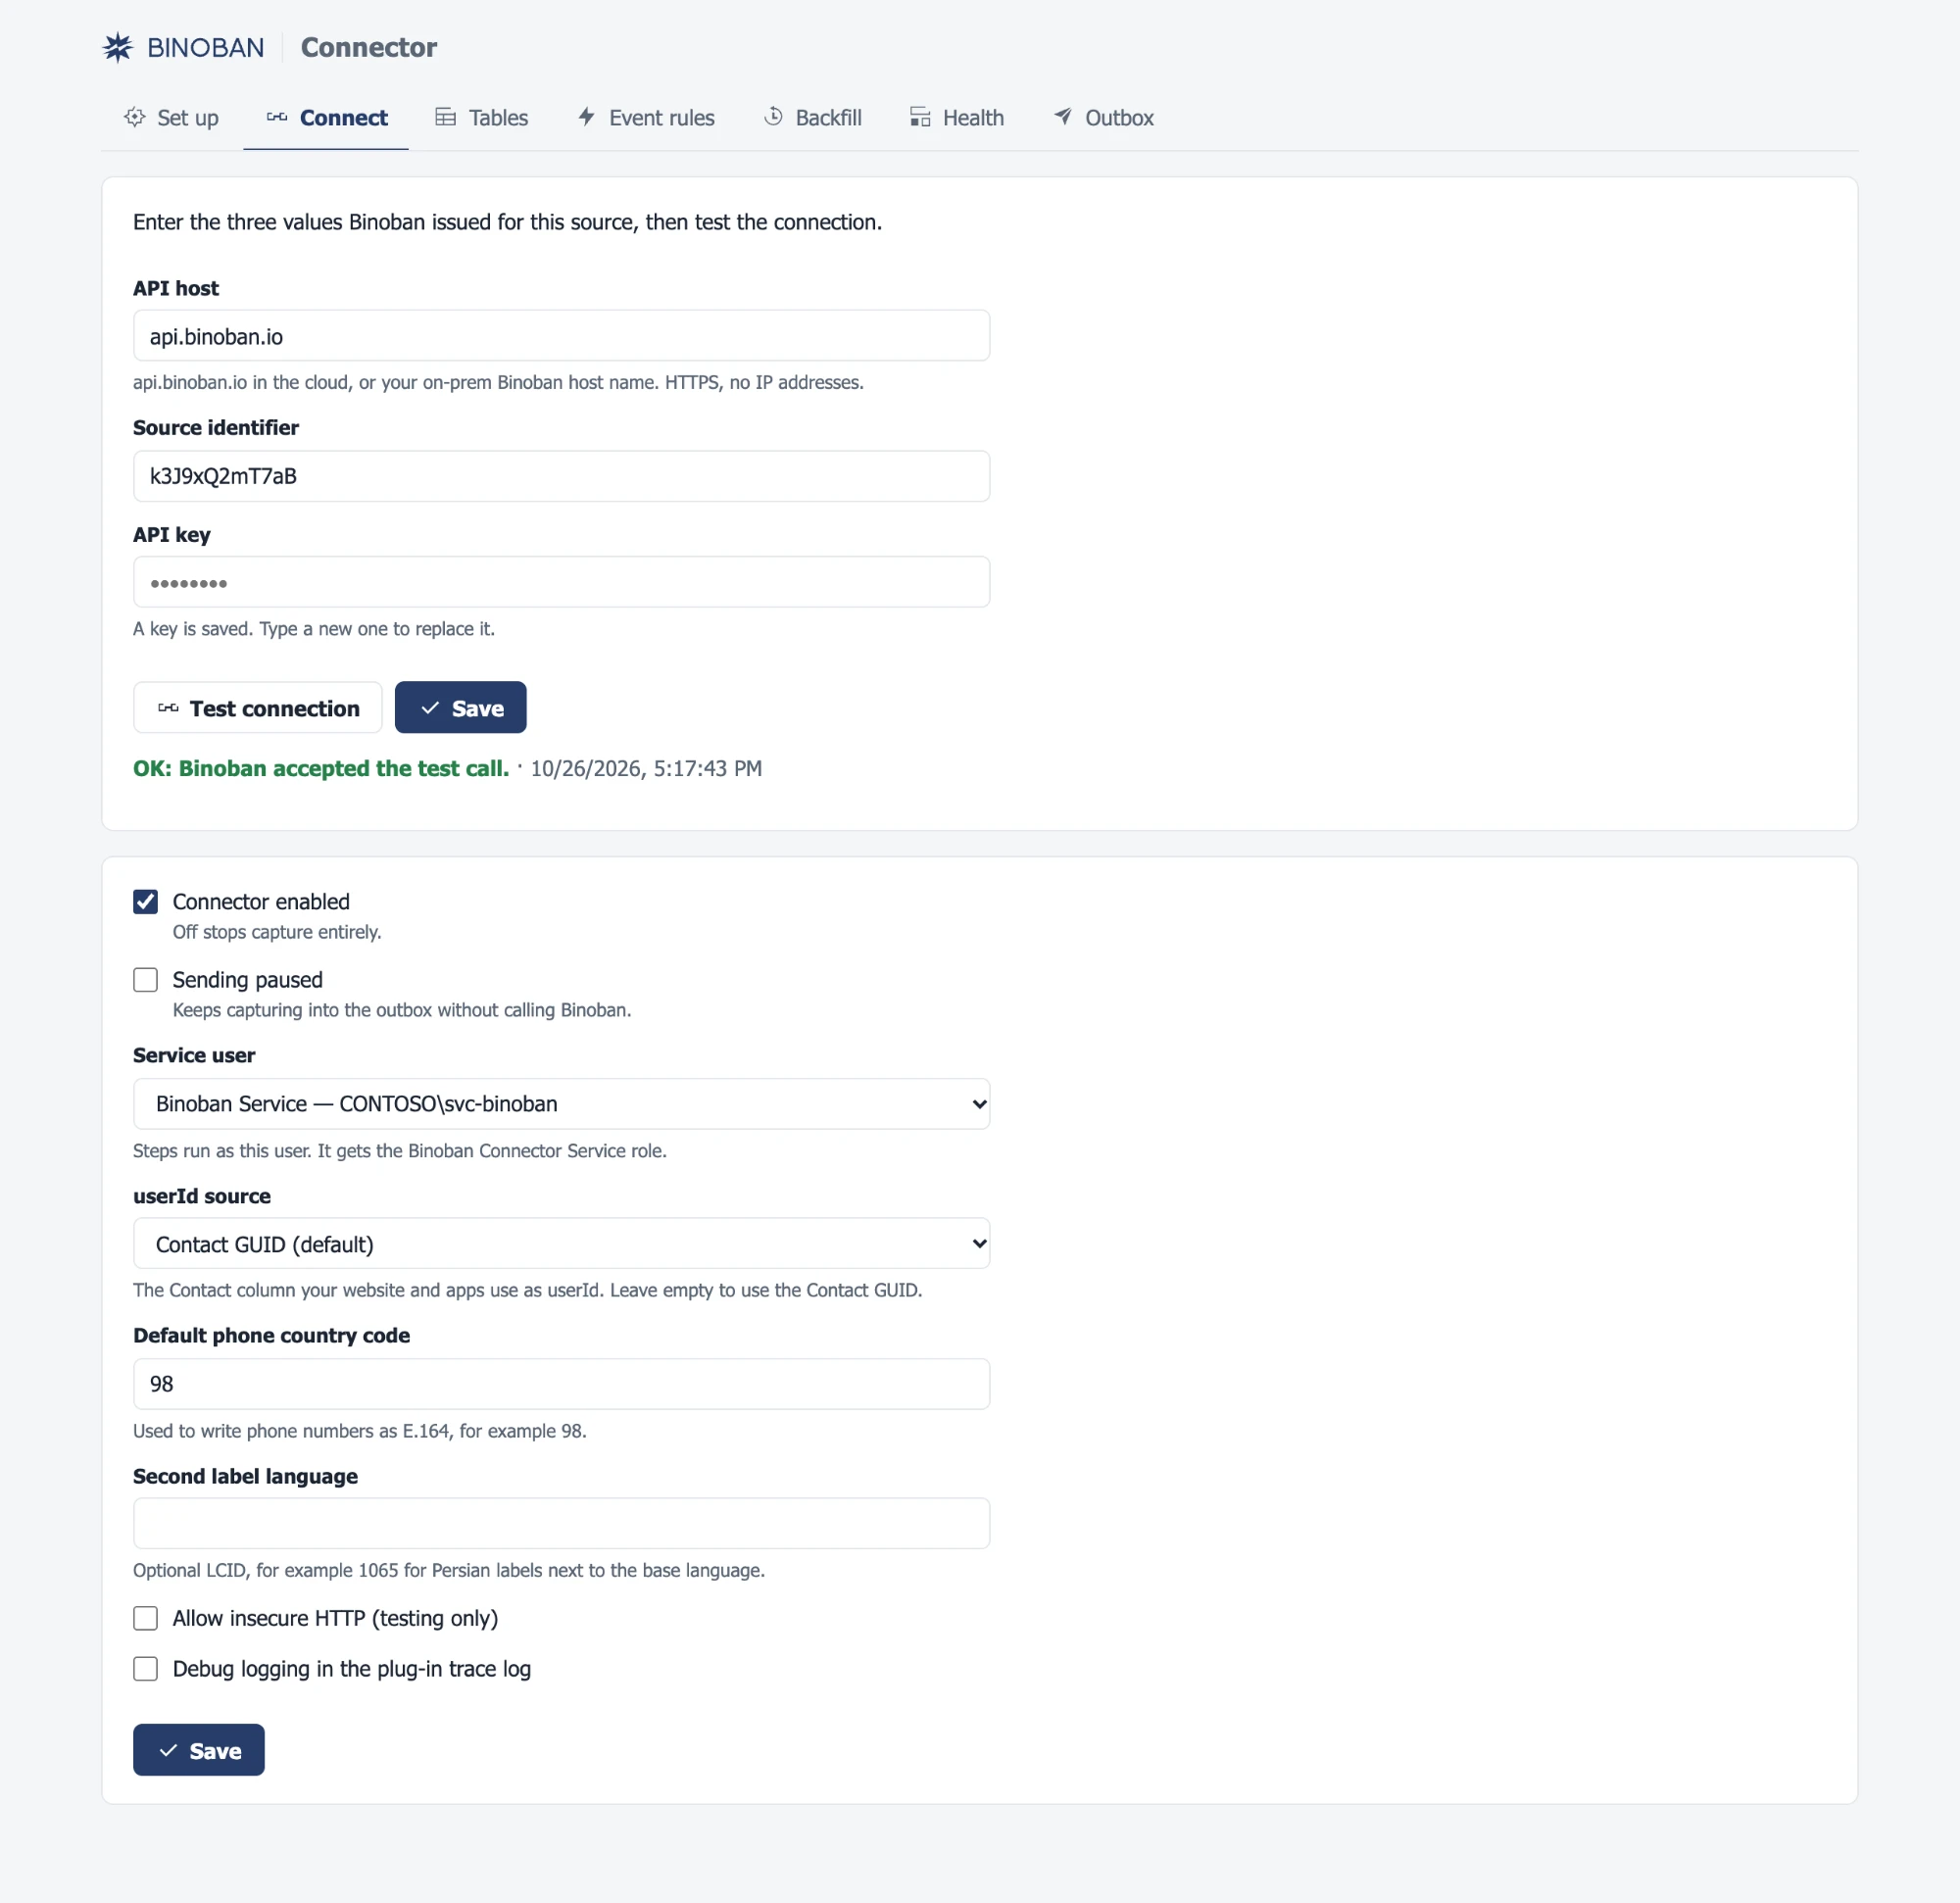
Connect tab: enter the API host, source identifier and API key. Choose the service user (the dedicated account, never yourself), tick Connector enabled, press Save, then Test connection. It must say OK: Binoban accepted the test call.
-
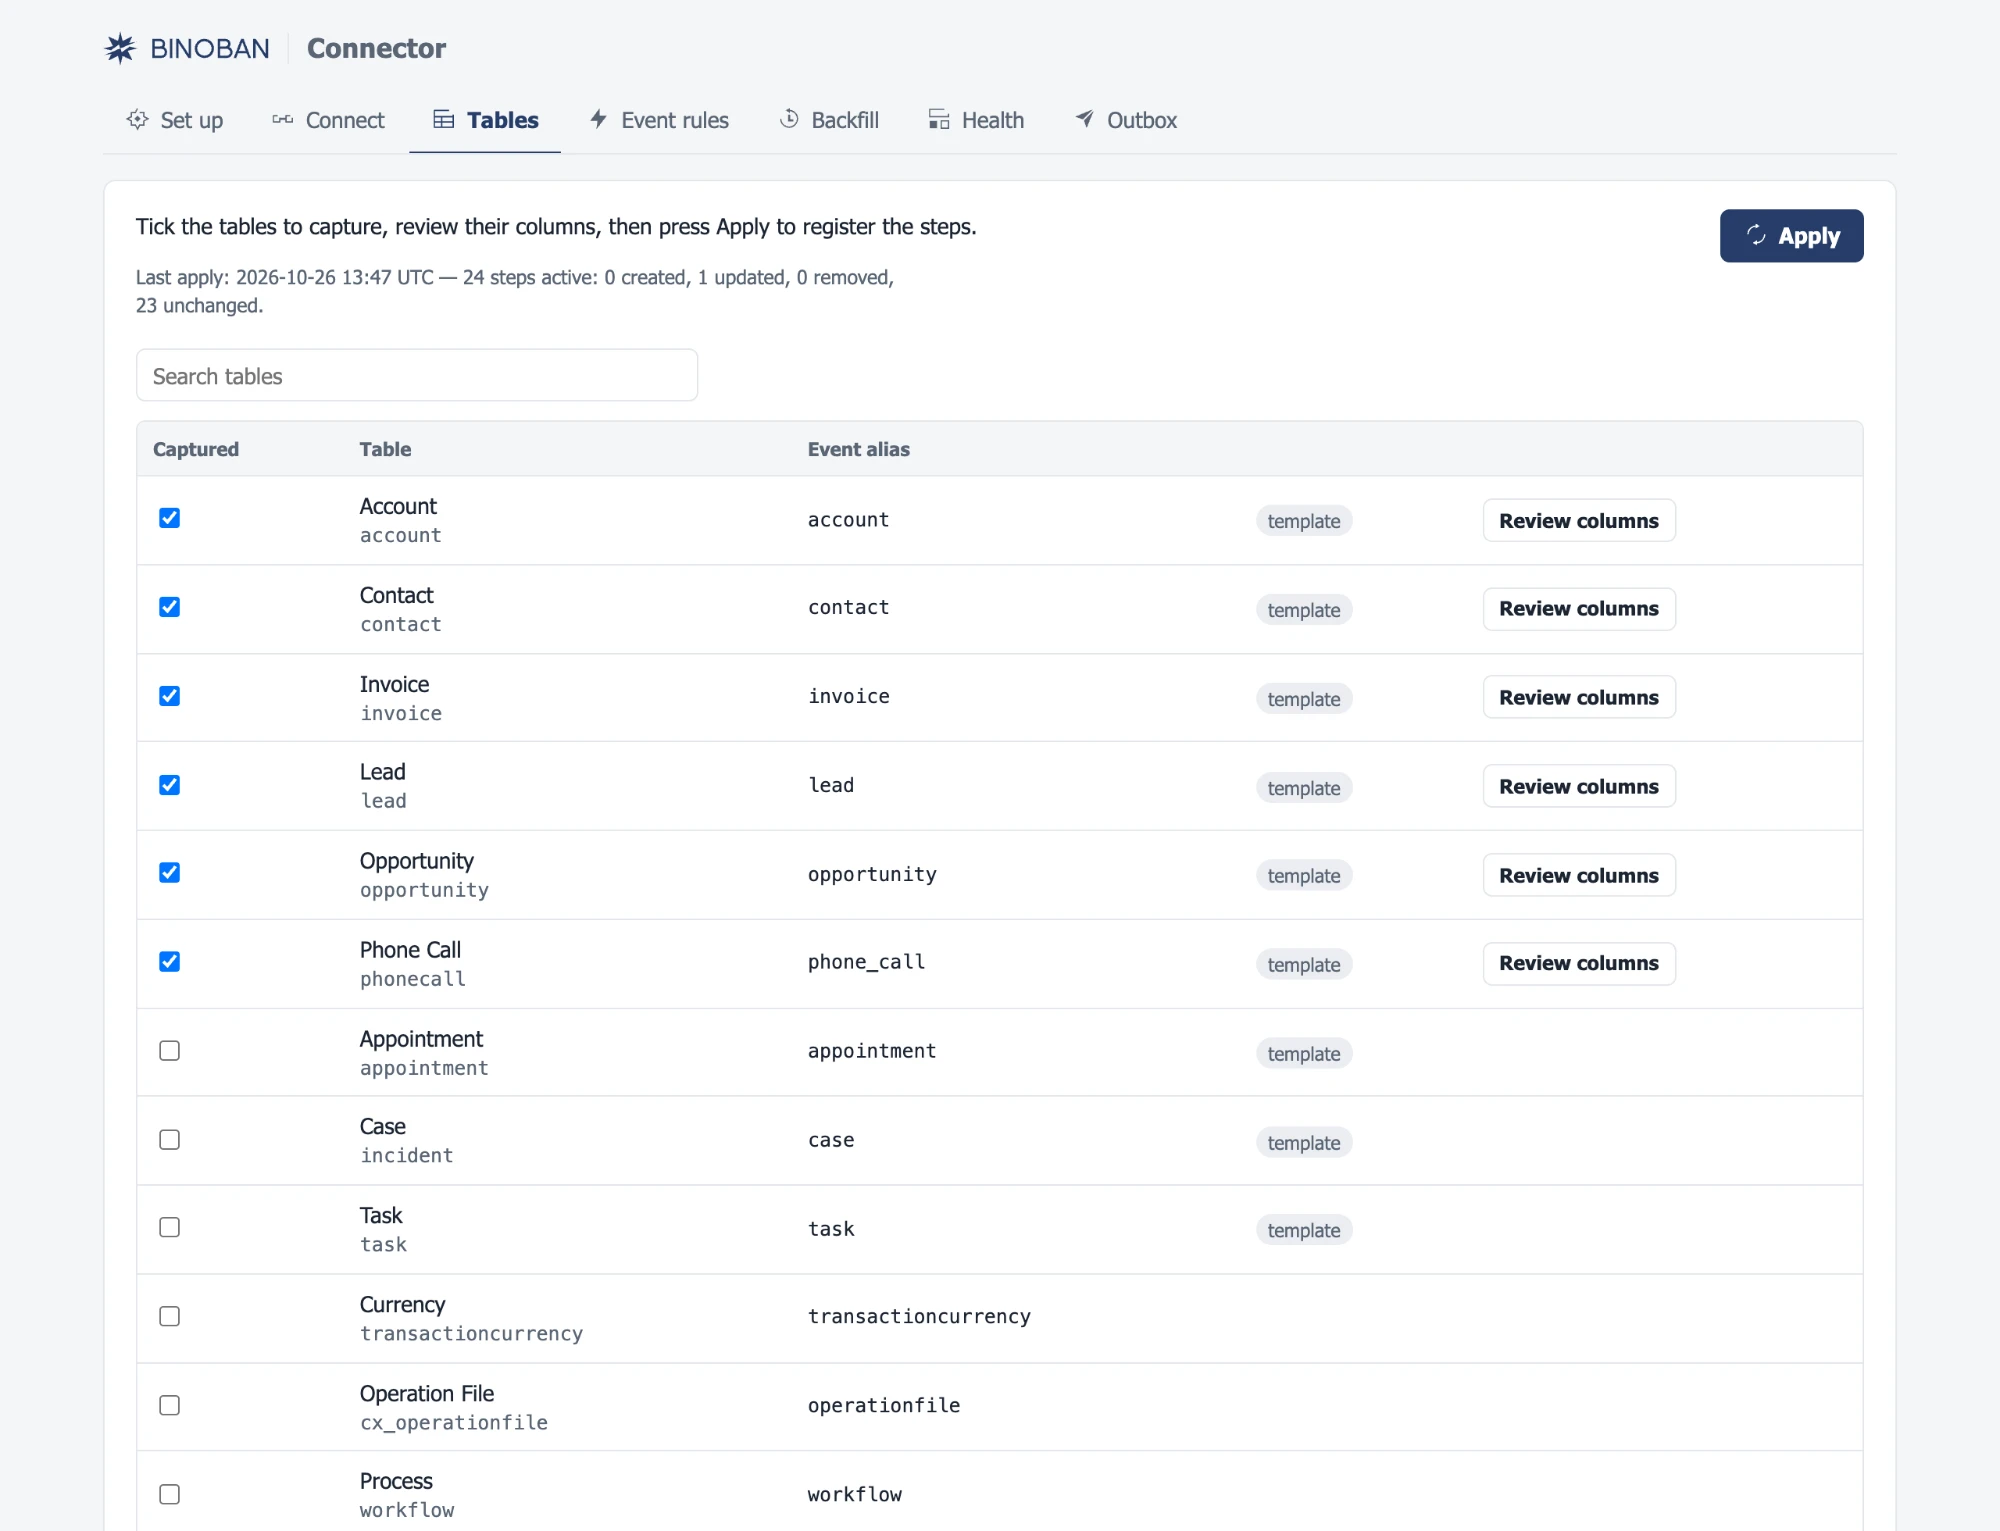
Tables tab: tick the tables to capture. Standard tables come pre-filled, marked template. Press Apply: the line under the description lists how many steps were registered.
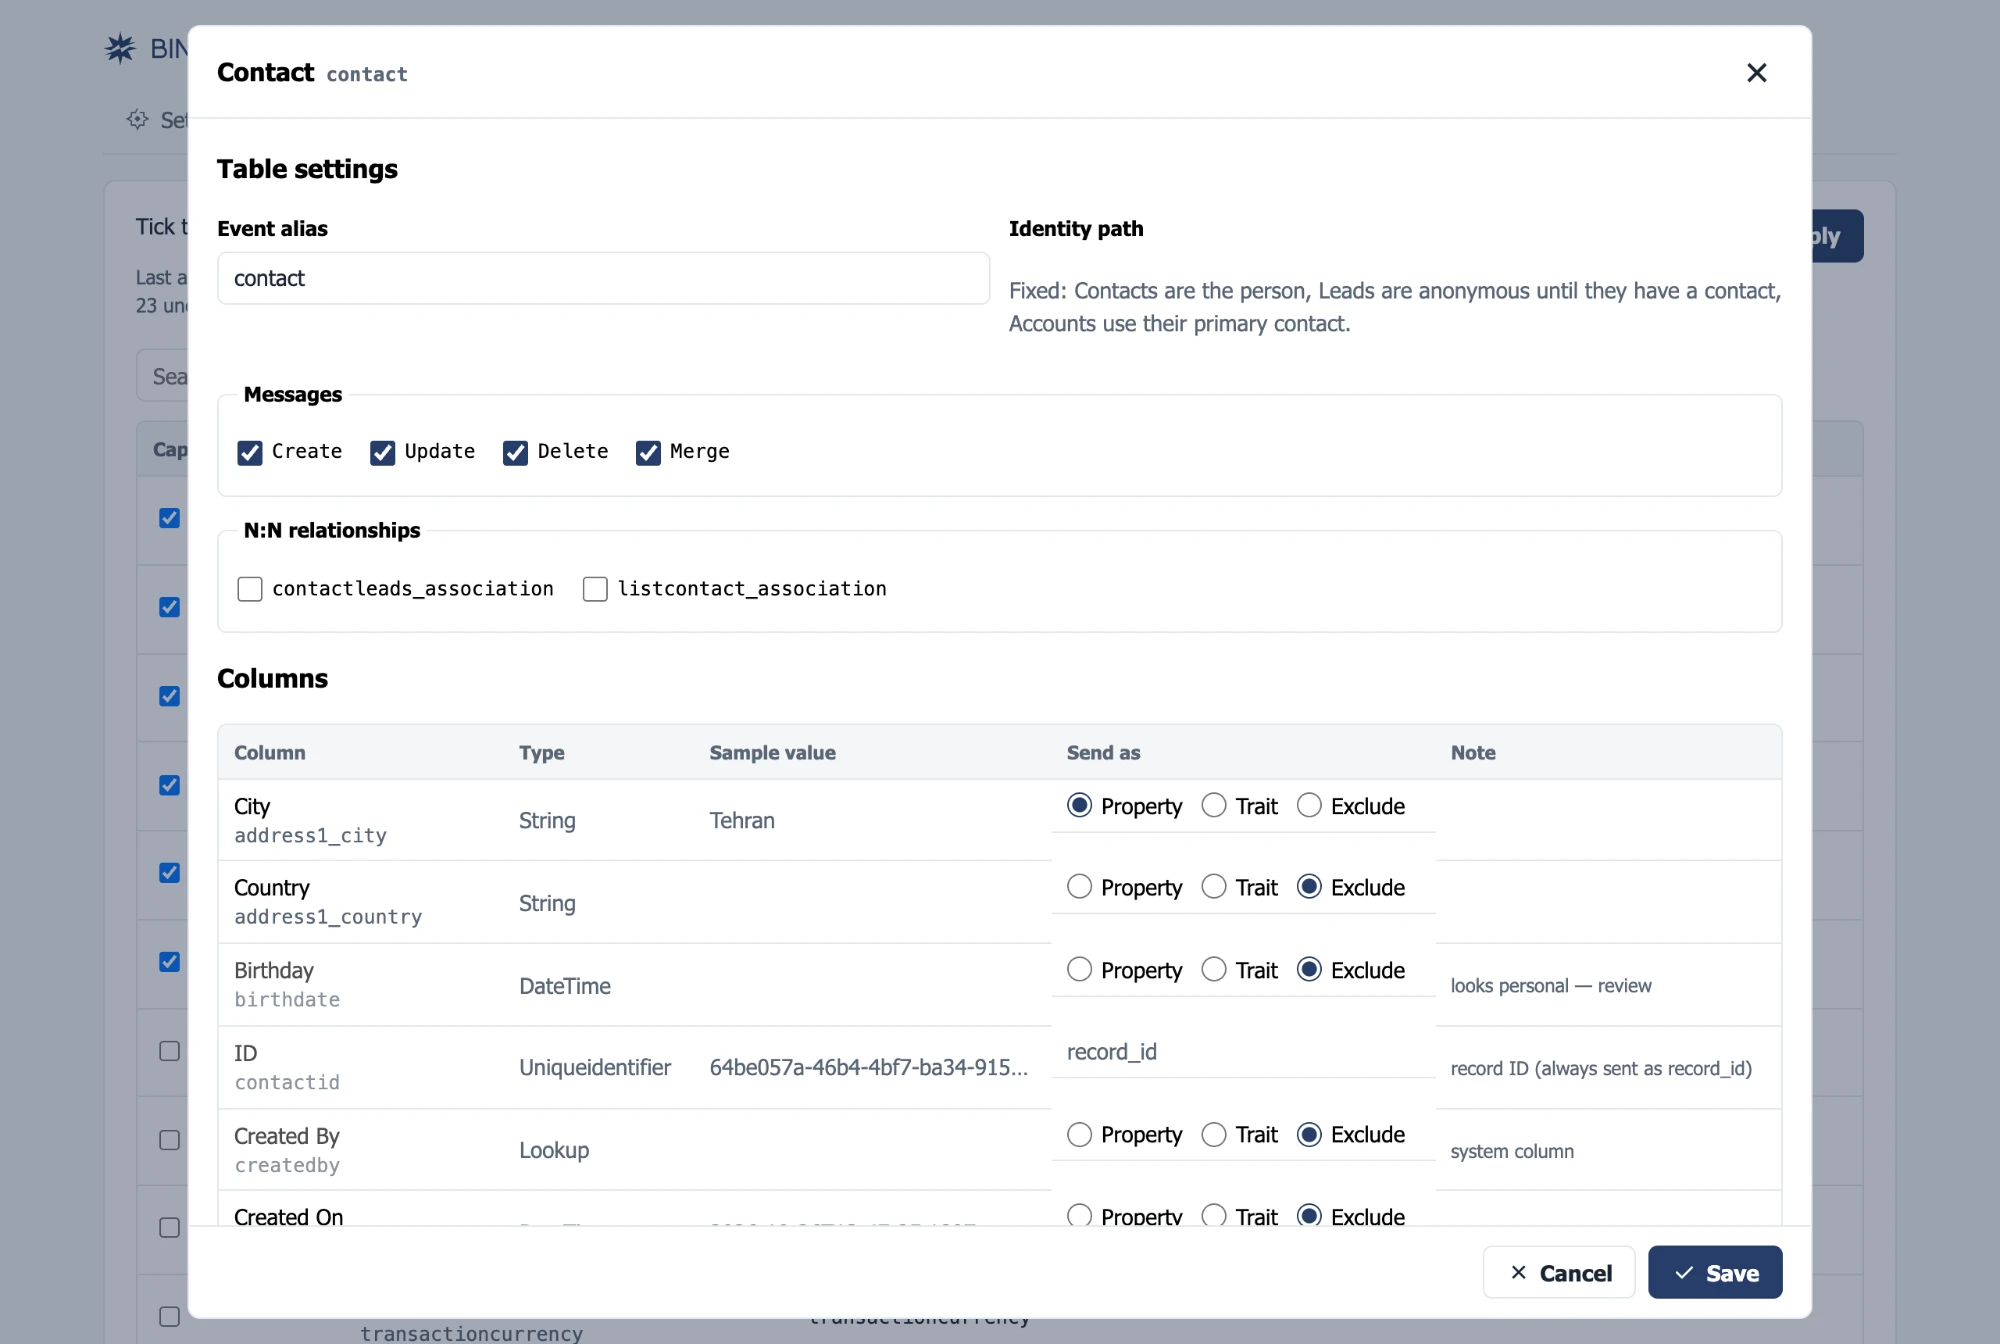
To change what a table sends, press Review columns. For each column choose Property (sent on events), Trait (sent on the person's profile; Contact and Lead only) or Exclude. The Note column says why a column starts excluded. Press Save, then Apply again.
-
Optional: event rules. Event rules tab → pick a table, a column, a from and a to value, type an event name (a–z, 0–9,
_,-and.only) and press Add rule. The named event fires in addition to the generic one.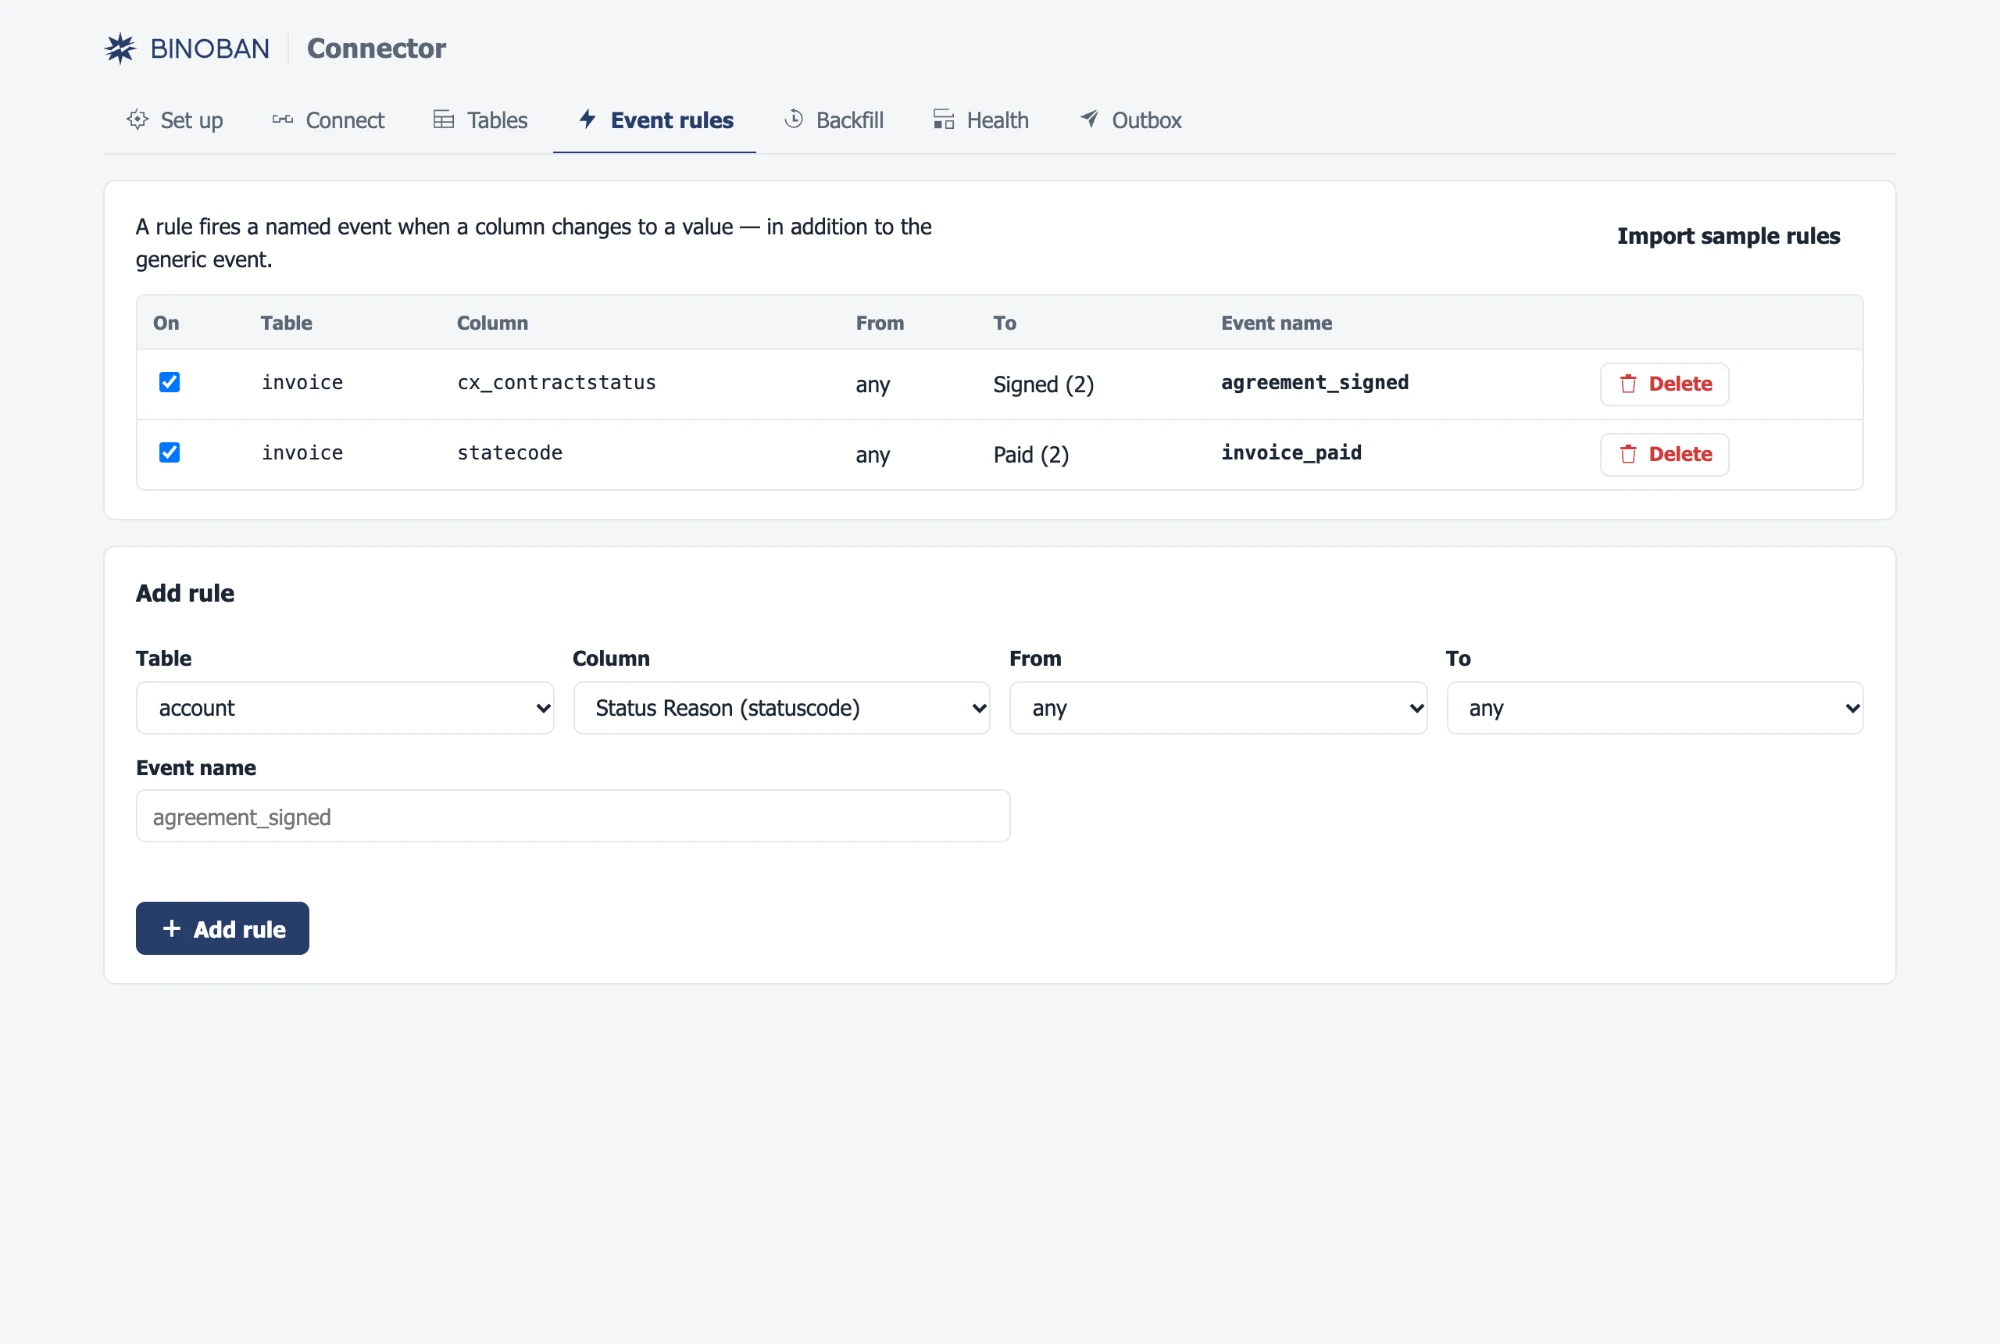
-
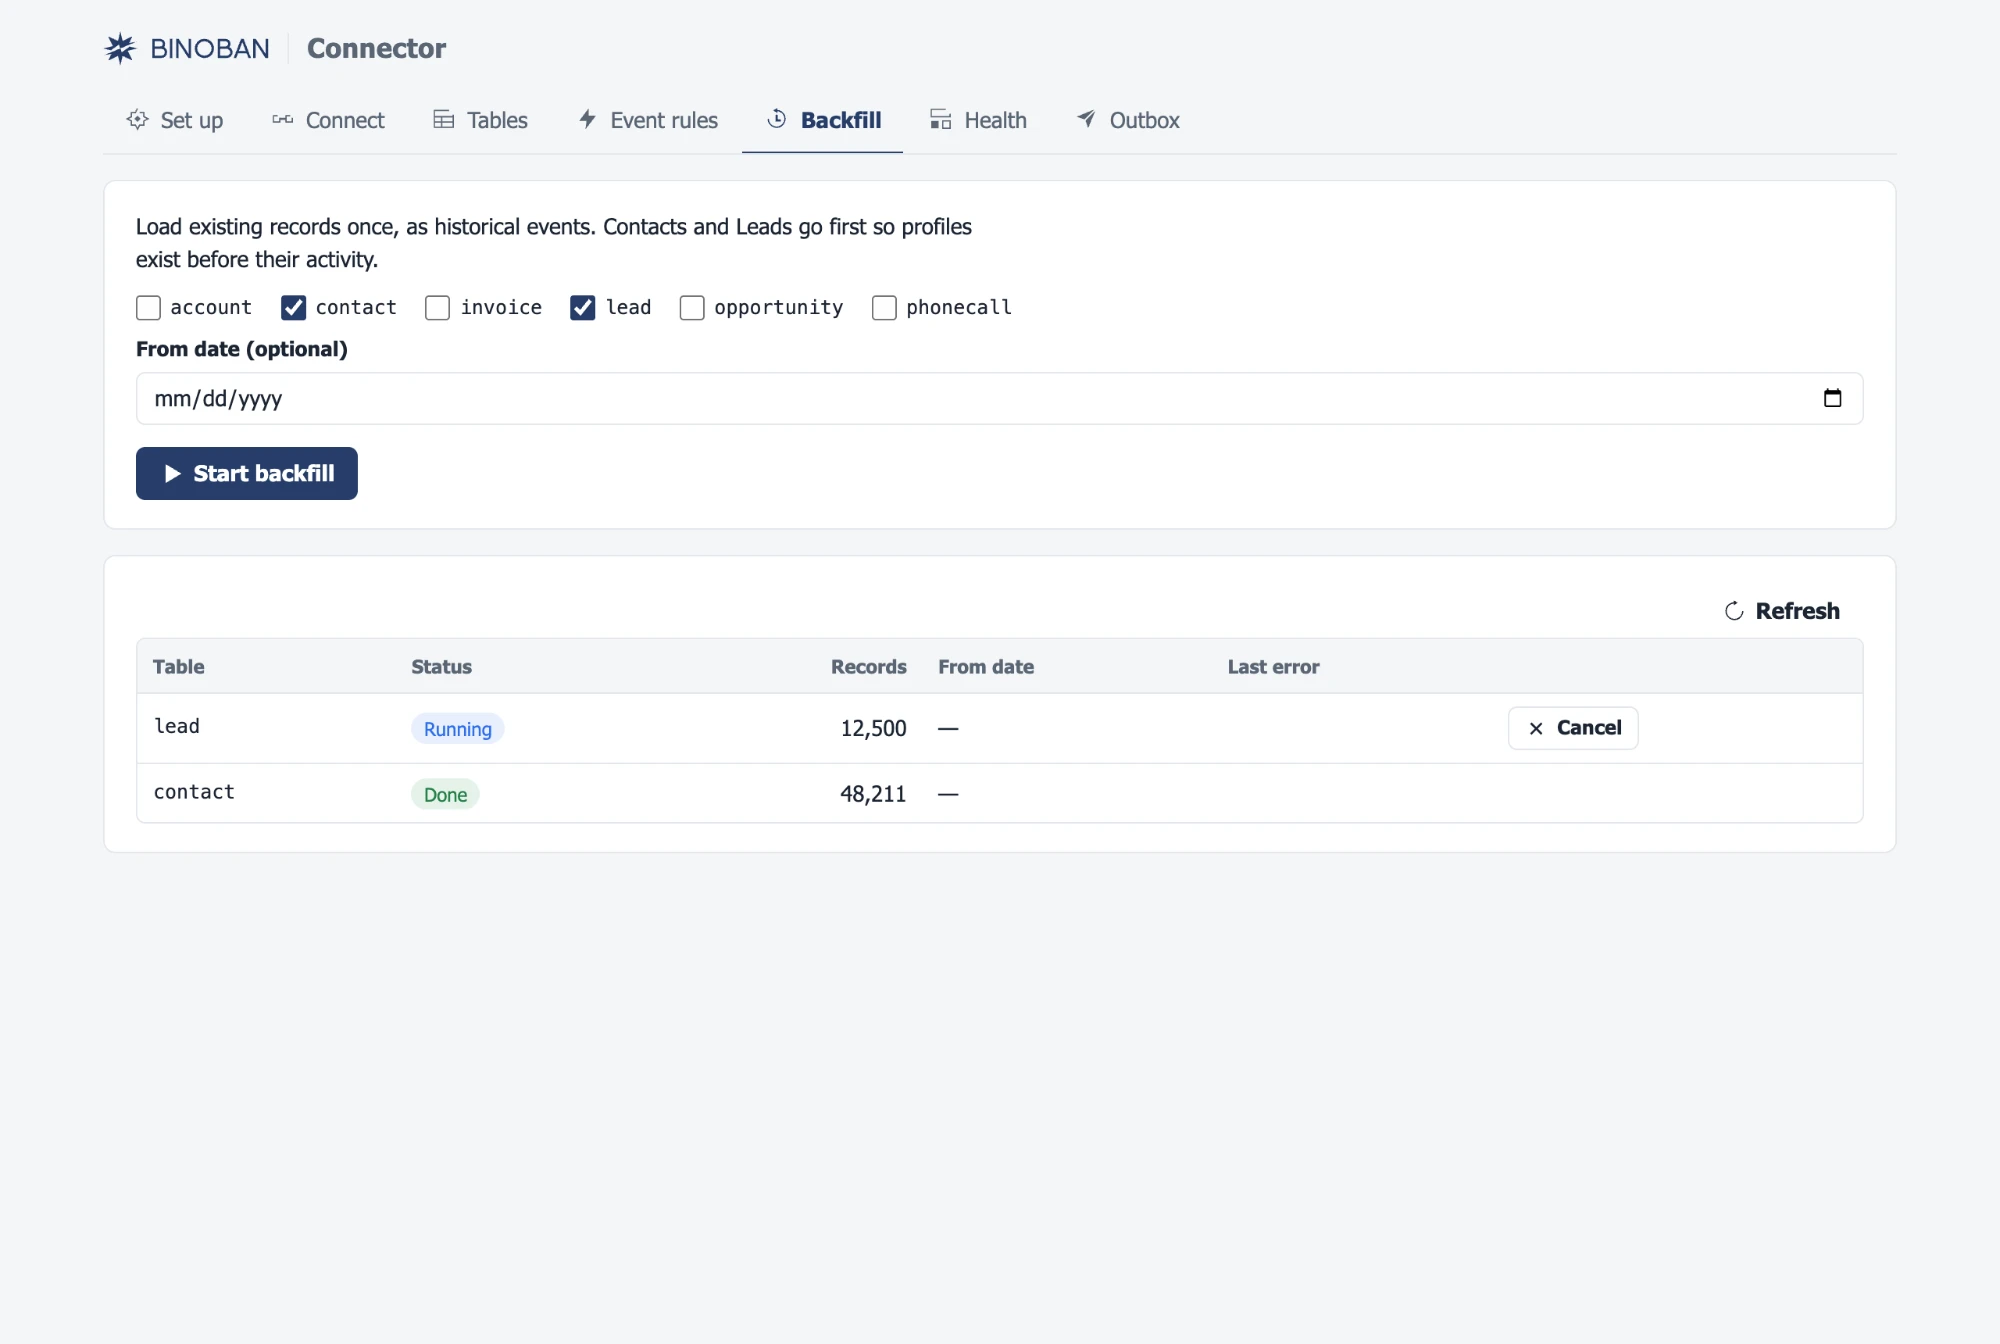
Optional: backfill. Backfill tab → tick Contacts and Leads first, optionally set a start date, and press Start backfill. Then do the other tables. Progress shows in the list below the button.
The connector caches its settings for 5 minutes, so wait that long after changing Connect or Tables before testing.
Check it works
Signed in as yourself (not the service user), create a test Lead, then check:
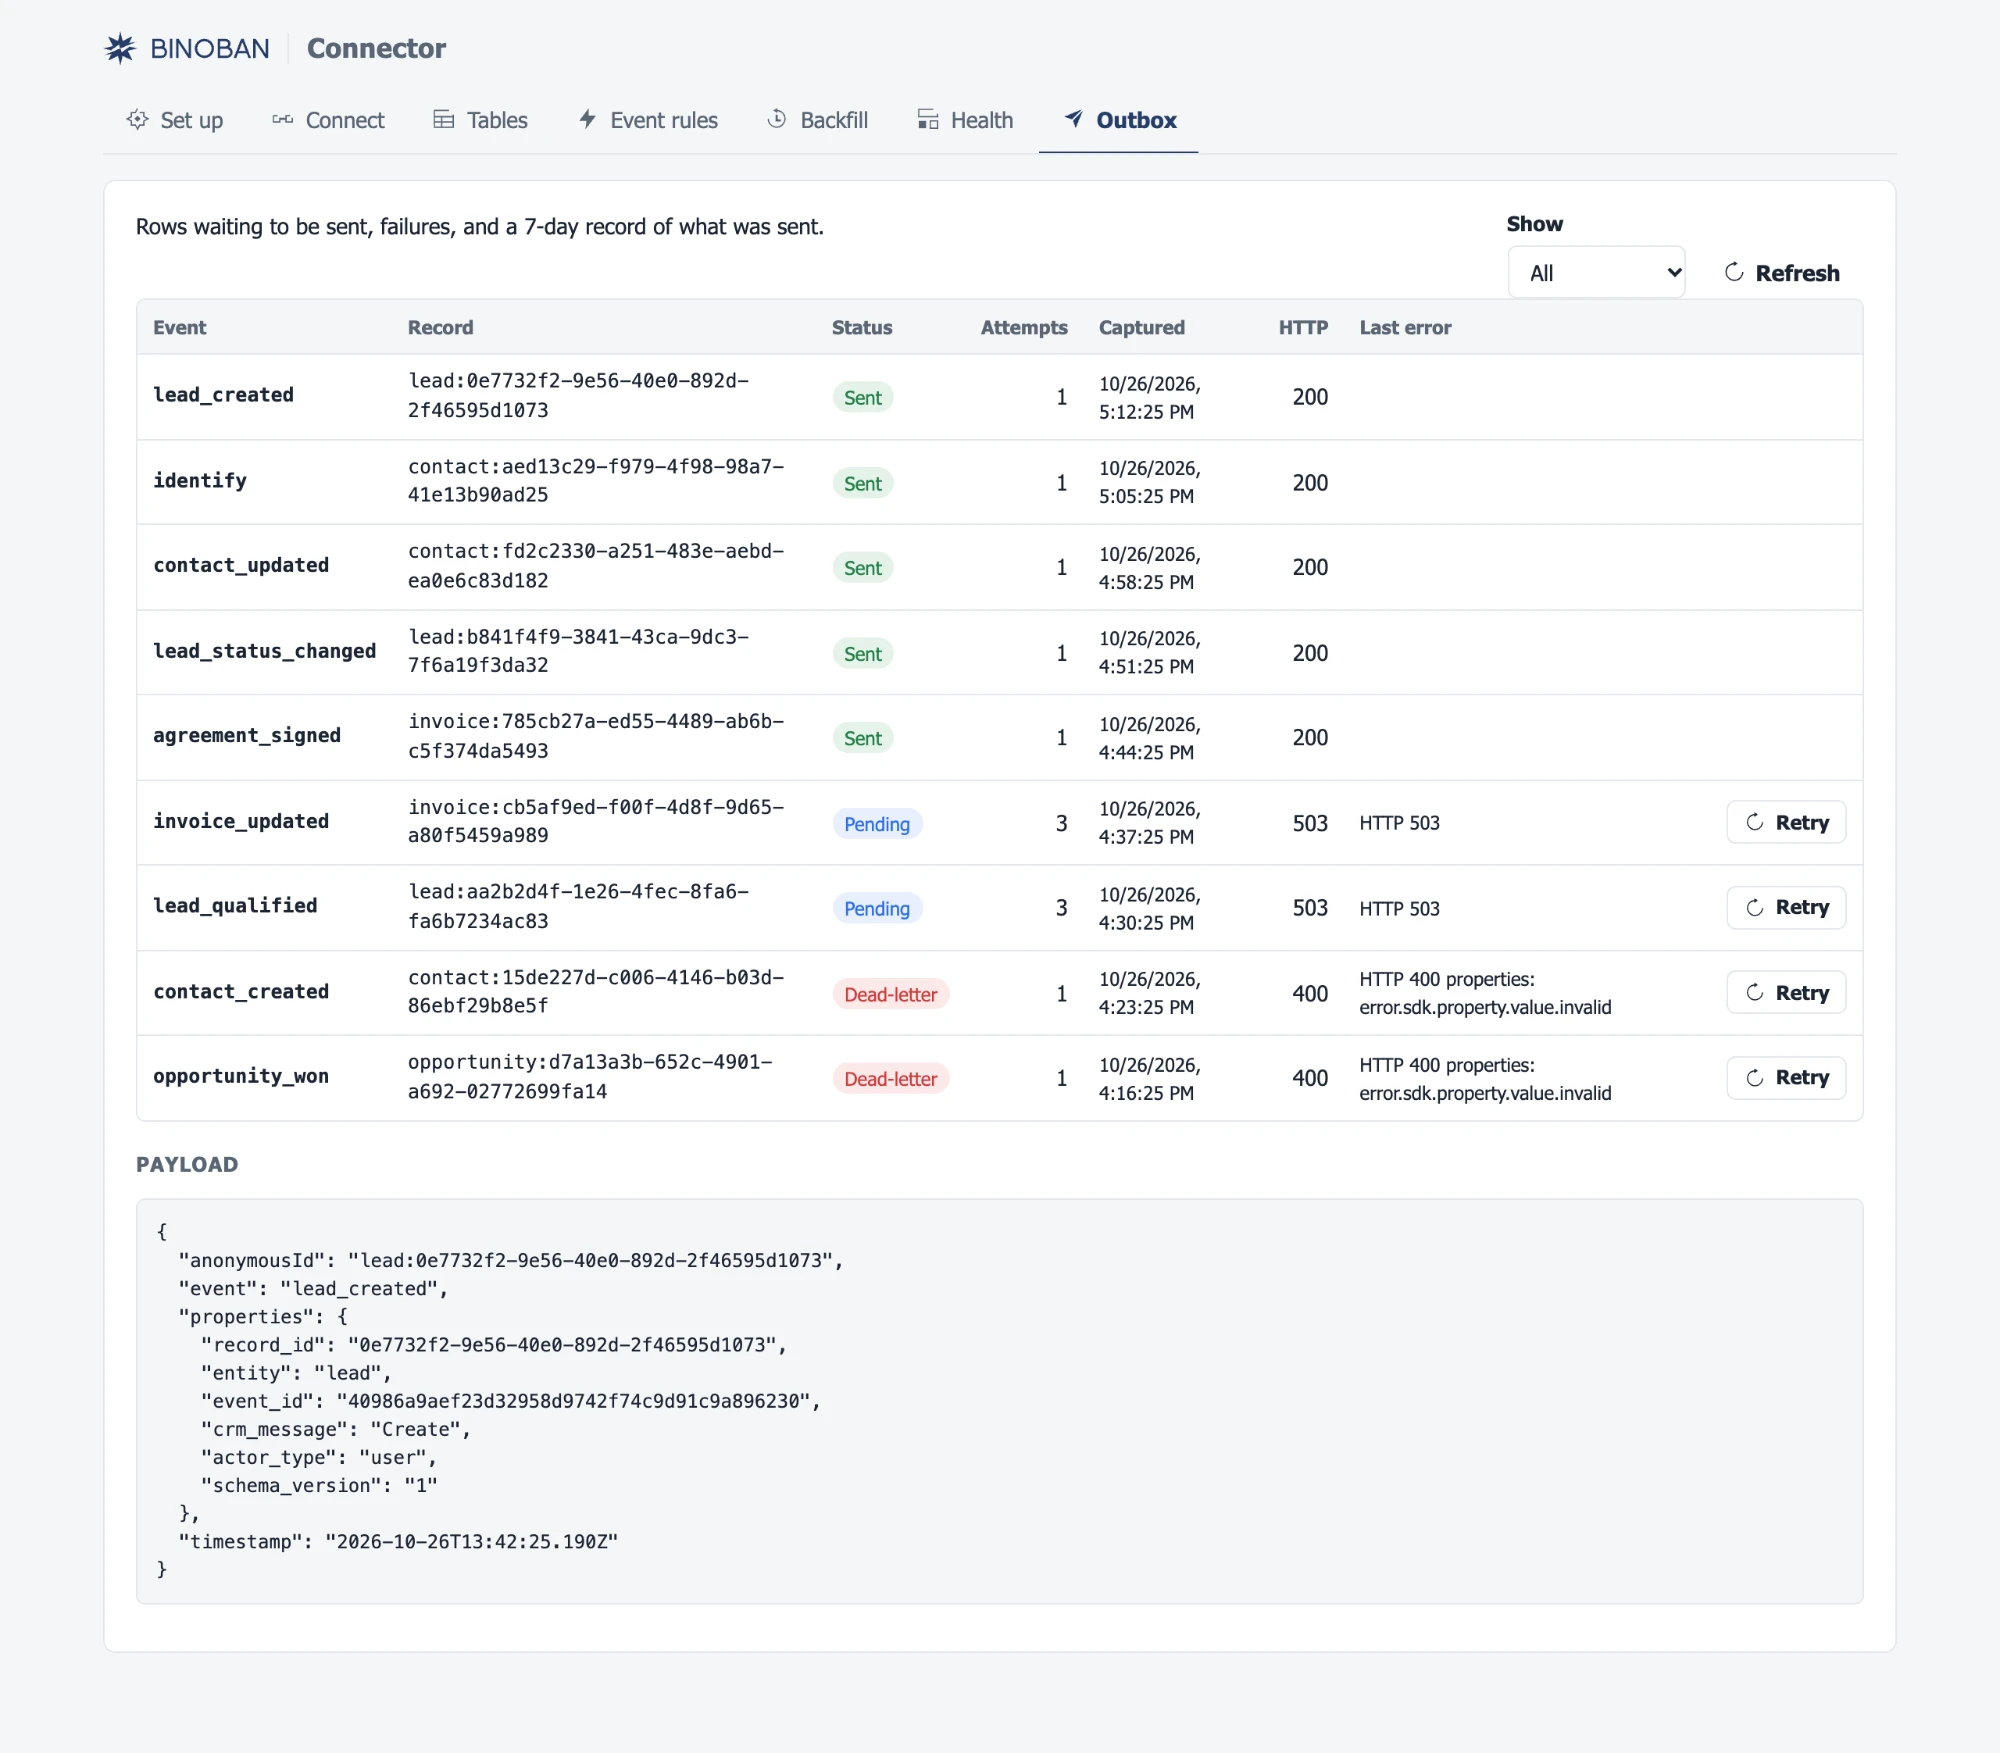
- Outbox tab, Show = All: a
lead_createdrow and anidentifyrow appear within a minute, status Sent, HTTP 200. - Health tab: Sent today goes up.
- In Binoban: the lead arrives as an anonymous profile with the
anonymousIdlead:<lead id>, carrying alead_createdevent. It joins the person's profile once the lead is qualified to a contact.
The Outbox lists every call: Sent (kept 7 days), Pending (waiting for a retry) and Dead-letter (rejected, with Binoban's reason). Click a row to see exactly what was sent; Retry sends it again.
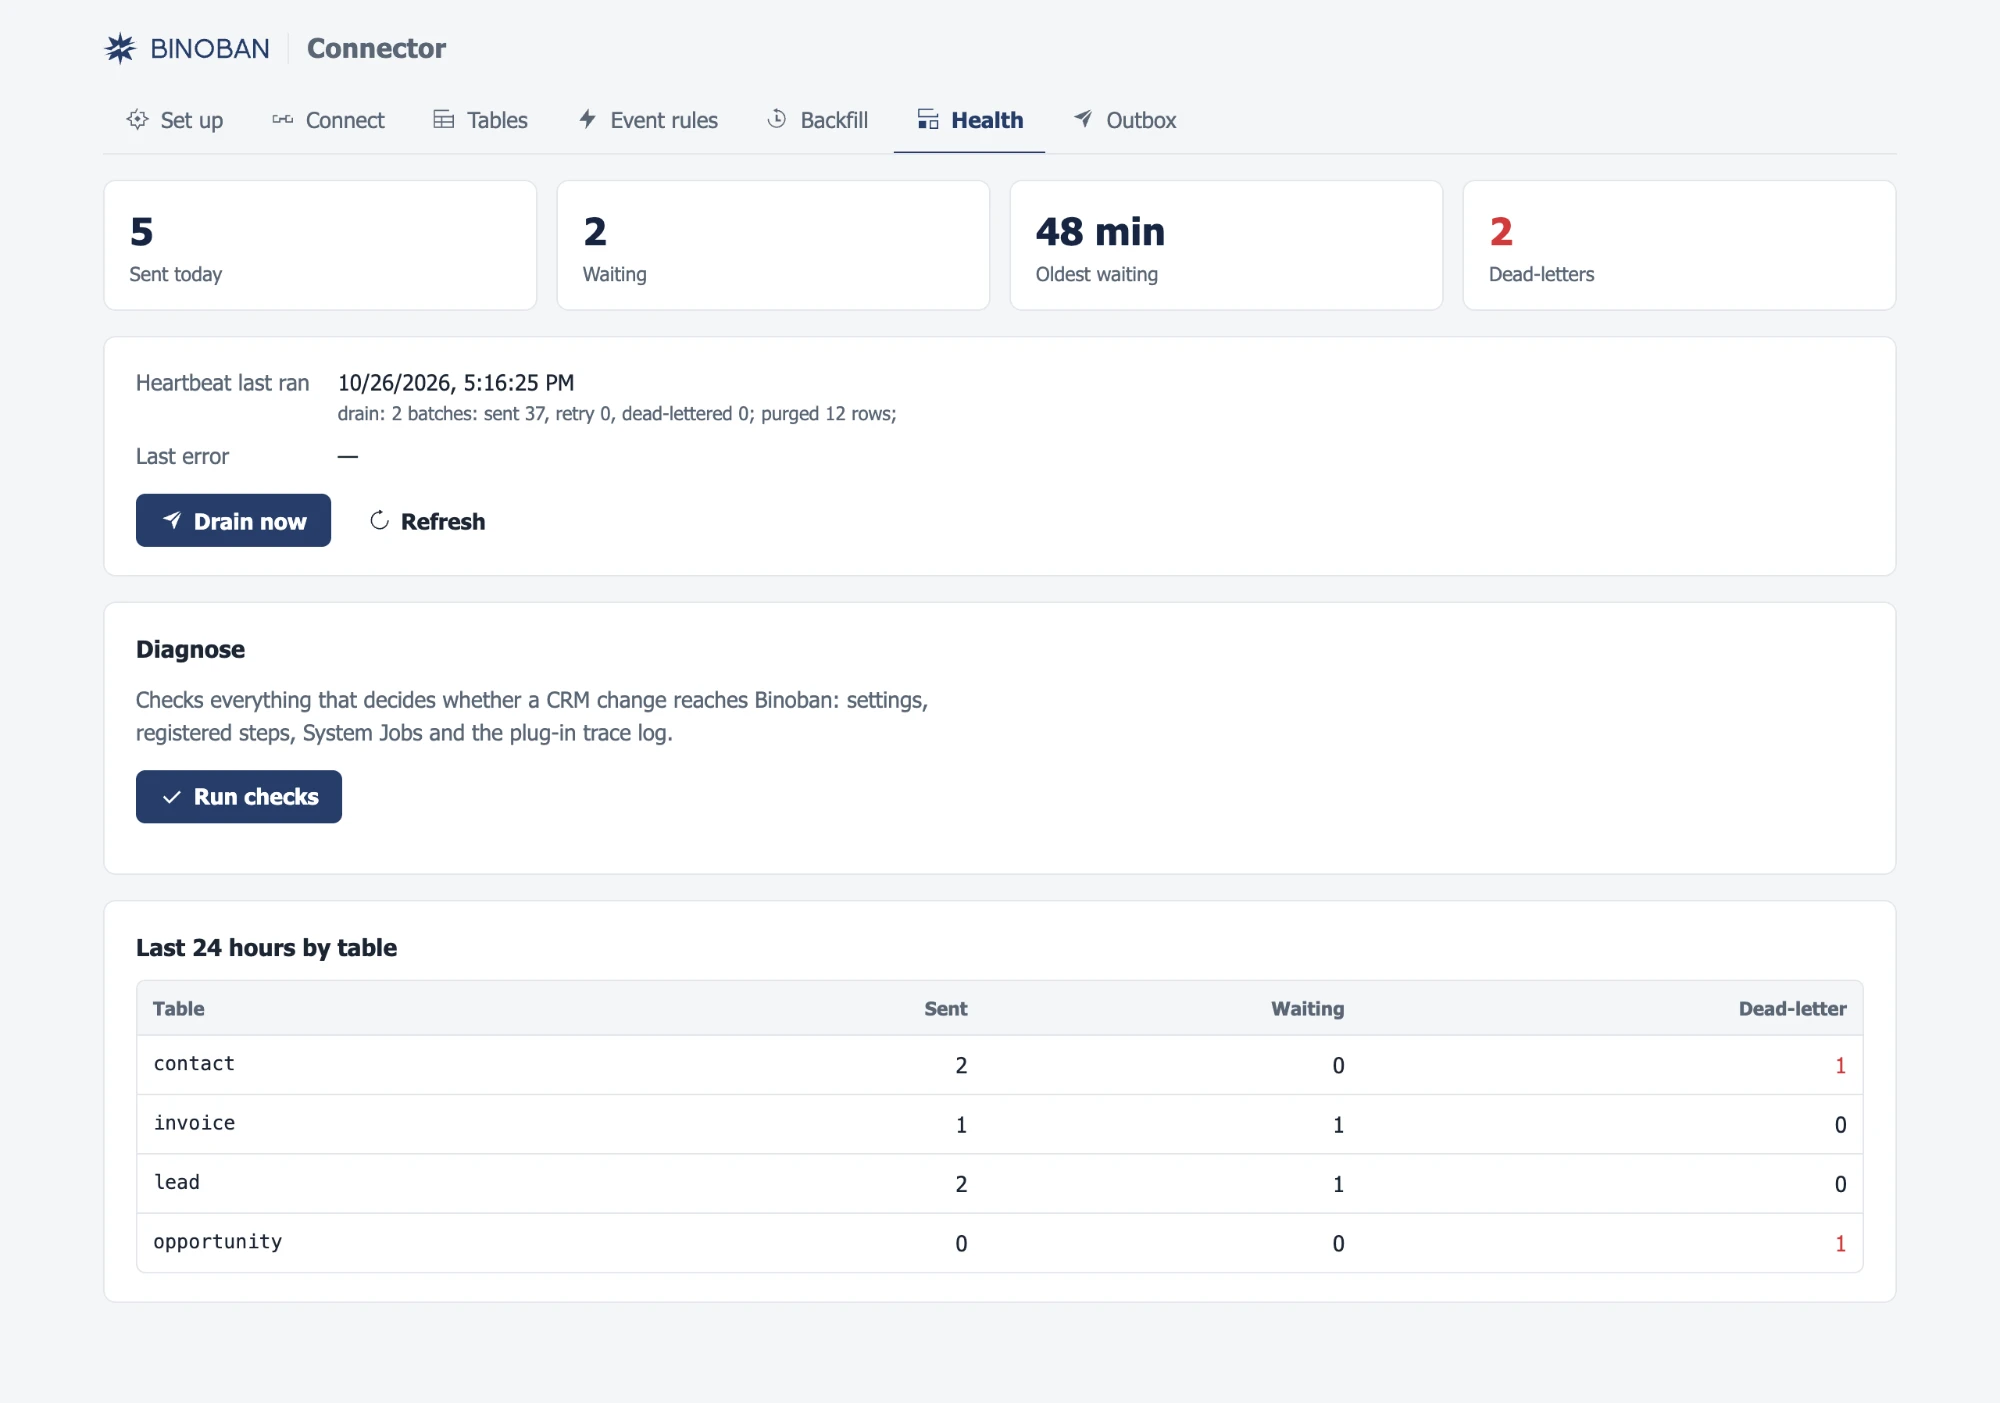
The Health tab shows today's sent count, how many calls are waiting and for how long, dead-letters, the heartbeat's last run, and a per-table count for the last 24 hours. Drain now sends waiting calls at once.
If it doesn't work
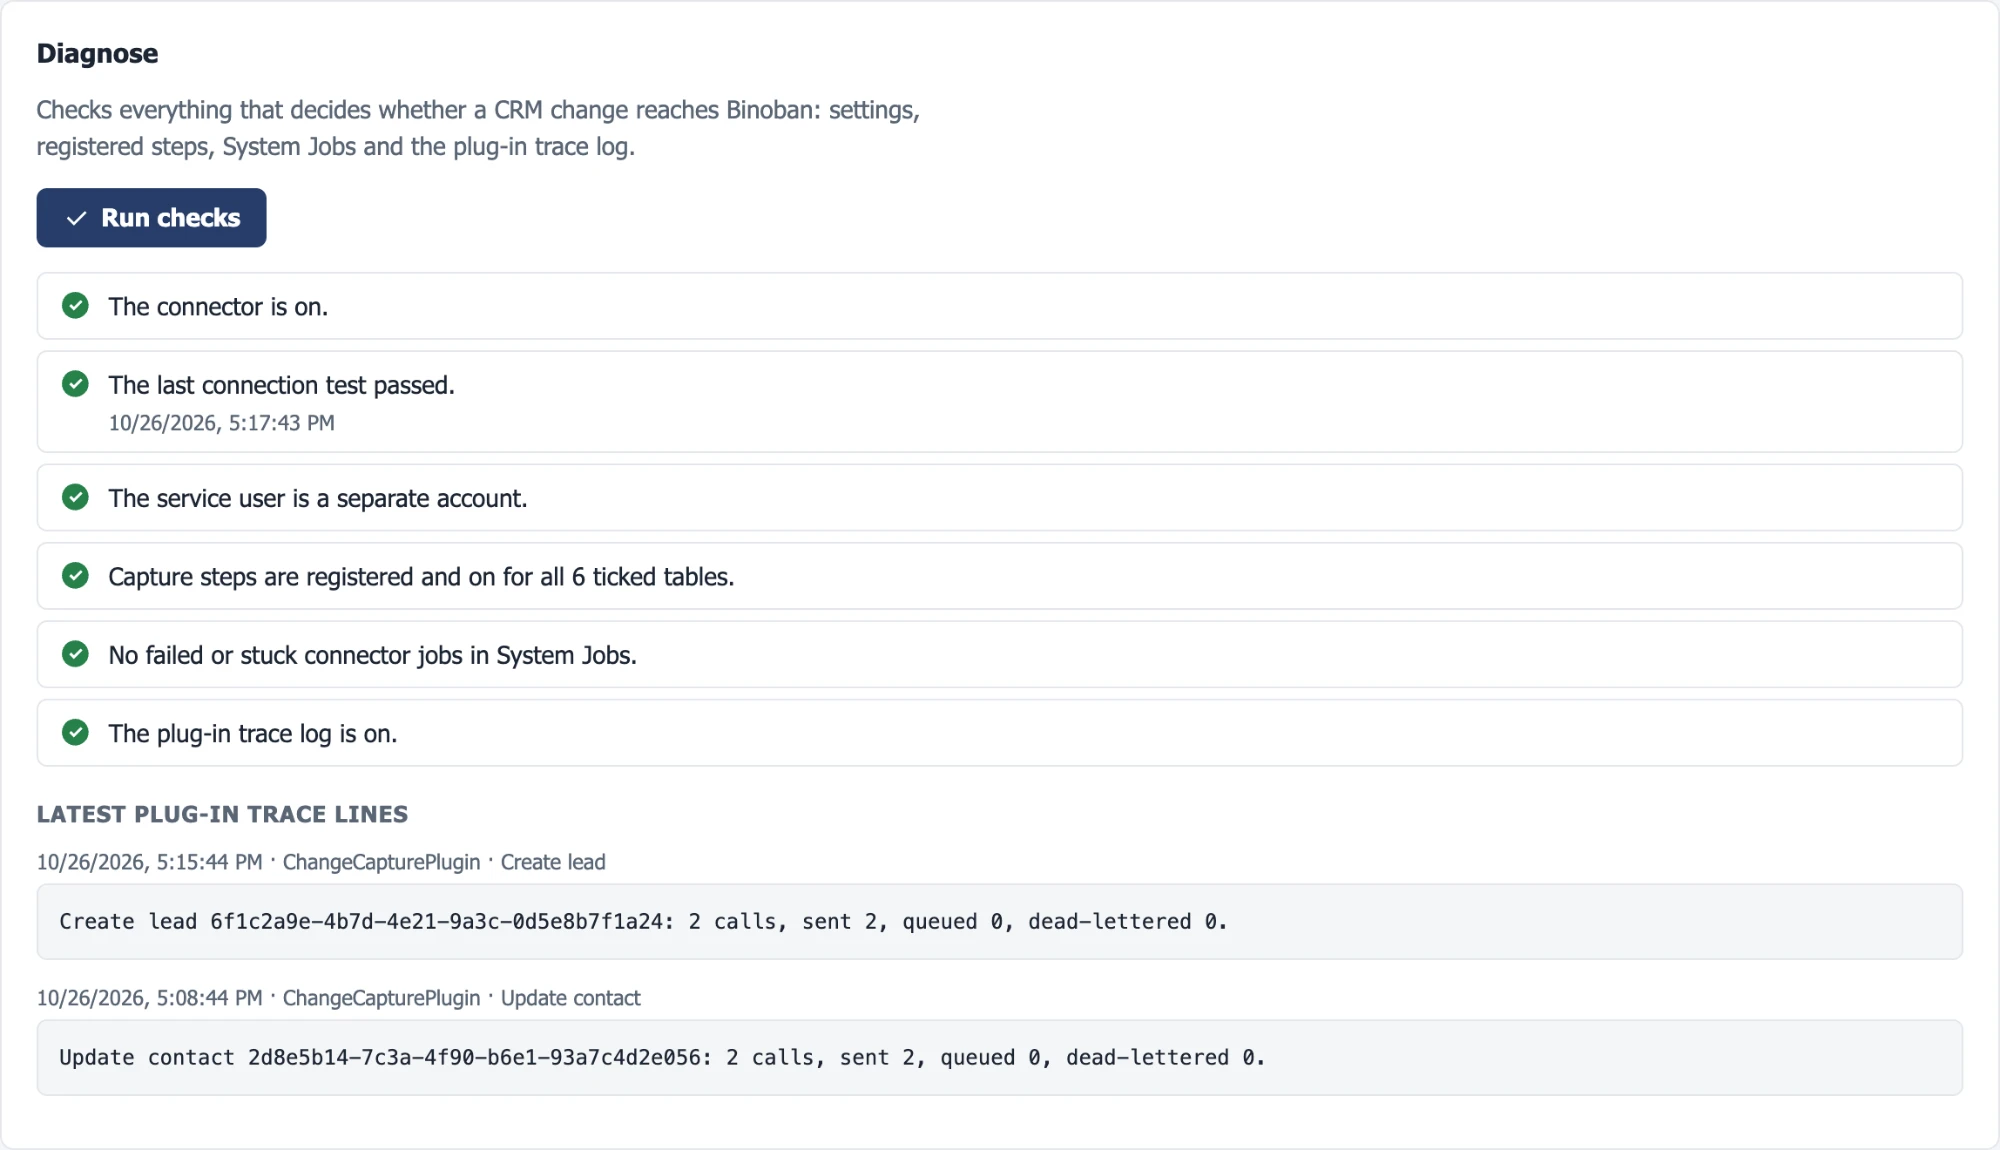
Start with Health → Run checks. It reads the settings, registered steps, System Jobs and the plug-in trace log in one click, and marks what's blocking in red.
| Symptom | Likely cause | Fix |
|---|---|---|
| No Outbox row at all | The connector is off, or you are the service user | Connect: tick Connector enabled; choose a separate service user → Save → Tables → Apply |
| Connector jobs stuck in Waiting in System Jobs | The Asynchronous Processing Service is stopped | Ask IT to start it on the CRM server |
| Outbox row Pending with a network error | The CRM server can't reach Binoban (DNS, firewall, certificate) | Fix the network path; rows send by themselves once it works |
| Banner "Sending is paused" | Binoban refused the key or source (401/404) | Correct the value on Connect → Test connection; sending resumes |
| Outbox row Dead-letter | Binoban rejected that event | Read the error on the row, fix the cause, press Retry |
| Apply warns about a message | That action doesn't exist in this CRM version | Untick it under Review columns → Messages |
Go to production
Once a test org works end to end, export the solution from it: Settings → Solutions → select Binoban Connector → Export → Managed. Install that managed zip in production with the same steps.
Uninstall
Set up → Before uninstalling → Remove connector steps, then delete the solution. Data already sent to Binoban stays there.